Cross Platform Control (Unity)
Often, it is desirable to use tech stacks other than Python to develop applications that leverage EMG-based control. For example, Unity is a game development environment that enables high-quality games and VR/AR development, making it an intriguing tool for developing immersive environments. LibEMG was designed with this in mind and can easily interface with these differing tools. As long as the programming interface has socket functionality (C# does), it can leverage LibEMG. This example shows how to leverage the library in a simple Unity game for myoelectric training. This same concept applies to more complex applications (e.g., AR/VR) and programming languages.
The Falling of Momo

The Falling of Momo is a simple platformer game that was designed for myoelectric training purposes [1,2]. The game’s goal is to control the character “Momo” down the screen and avoid the spikes for as long as possible. This game was originally developed in processing, but a simplified version in Unity was created for this demo. In this version, the three inputs and their respective controls are:
Game Movement |
Keyboard |
EMG |
|---|---|---|
Move Left |
Left Arrow Key |
Wrist Flexion |
Move Right |
Right Arrow Key |
Wrist Extension |
Jump |
Space Bar |
Hand Closed |
*Note: These controls are set up for playing with the right arm.
Momo Unity Development
The first task was to create the Momo-Unity game. There are many great online Unity tutorials, so we won’t get into the intricate details of the game design.


In the initial game design, we controlled the character using the keyboard. Unity updates in a loop at a default of 60Hz in its update method. As displayed below in MovementController.cs we have created a script that listens for key events in the update method (i.e., 60 times a second) and reacts accordingly.
using System.Collections;
using System.Collections.Generic;
using UnityEngine;

public class MovementController : MonoBehaviour
{
    private float speed = 5;
    private float upwardsForce = 300;
    public Rigidbody2D rb;
    private Vector2 velocity;

    private SoundManager soundManager;

    void Start() {
        soundManager = FindObjectOfType<SoundManager>();
    }

    void Update()
    {
        Vector3 pos = rb.transform.position;
        if (Input.GetKey(KeyCode.LeftArrow)) {
            pos.x -= speed * Time.deltaTime;
        } else if (Input.GetKey(KeyCode.RightArrow)) {
            pos.x += speed * Time.deltaTime;
        } else if (Input.GetKeyDown(KeyCode.Space)) {
            rb.AddForce(new Vector2(0,1) * upwardsForce);
            soundManager.PlayJumpSound();
        }
        rb.transform.position = pos;
    }
}
Momo EMG Control
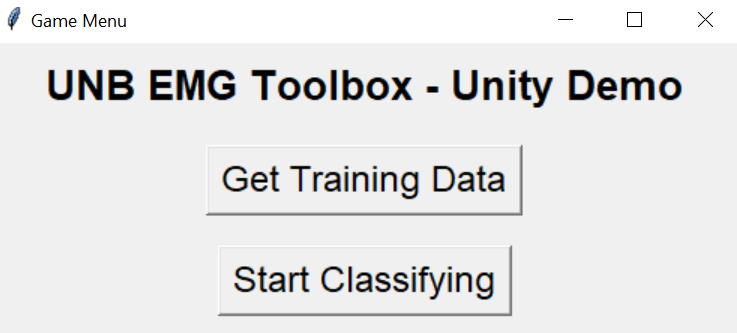
Once the initial game worked with simple keyboard controls, we implemented the EMG-based input. Since LibEMG is developed in Python, we had to include the machine learning/training portion as a Python application. While there may be ways to call Python from within C#, this was outside the scope of this example. Instead, we created a simple UI with two buttons: Get Training Data and Start Classifying. All python code can be found in myo_control.py. The library imports required for this example are as follows:
from libemg.gui import GUI
from libemg.data_handler import OnlineDataHandler, OfflineDataHandler, RegexFilter
from libemg.feature_extractor import FeatureExtractor
from libemg.emg_predictor import OnlineEMGClassifier, EMGClassifier
from libemg.streamers import myo_streamer


When the Get Training Data button is clicked, we leverage the library’s Training UI module to automatically download the desired gestures and start the training procedure.
def launch_training(self):
    self.window.destroy()
    training_ui = GUI(self.odh, gesture_height=500, gesture_width=500)
    training_ui.download_gestures([1,2,4,5], "images/")
    training_ui.start_gui()
    self.initialize_ui()
After accumulating the training data, predictions can be streamed over a UDP socket for Unity to leverage. To do this an OnlineEMGClassifier object is created.
The first step involves processing the accumulated training data into an OfflineDataHandler. Note that there are four classes [0,1,2,3] and three reps [0,1,2], aligning with the recorded training data.
# Step 1: Parse offline training data
dataset_folder = 'data/'
classes_values = ["0","1","2","3"]
reps_values = ["0", "1", "2"]
regex_filters = [
    RegexFilter(left_bound = "_C_", right_bound=".csv", values = classes_values, description='classes'),
    RegexFilter(left_bound = "R_", right_bound="_C_", values = reps_values, description='reps')
]

odh = OfflineDataHandler()
odh.get_data(folder_location=dataset_folder, regex_filters=regex_filters, delimiter=",")
train_windows, train_metadata = odh.parse_windows(WINDOW_SIZE, WINDOW_INCREMENT)
The next step involves extracting features from the offline data. Let’s experiment with the LS9 feature group - a robust set of features for devices with low-sampling rates.
# Step 2: Extract features from offline data
fe = FeatureExtractor()
feature_list = fe.get_feature_groups()['HTD']
training_features = fe.extract_features(feature_list, train_windows)
After extracting the features from the training data, we have to create a dataset dictionary to pass to the online classifier.
data_set = {}
data_set['training_features'] = training_features
data_set['training_labels'] = train_metadata['classes']
Next, we have to create an offline EMG classifier. We have opted for an SVM model with velocity control (meaning that each prediction is associated with a contraction intensity) and two post-processing techniques: majority voting and rejection. These post-processing techniques were added to improve the robustness of the control scheme.
# Step 4: Create the EMG classifier
o_classifier = EMGClassifier("SVM")
o_classifier.fit(feature_dictionary=data_set)
o_classifier.add_velocity(train_windows, train_metadata['classes'])
Finally, lets create the OnlineEMGClassifier and begin streaming predictions. Note that we set block to false so that we don’t block the UI thread.
# Step 5: Create online EMG classifier and start classifying.
self.classifier = OnlineEMGClassifier(o_classifier, WINDOW_SIZE, WINDOW_INCREMENT, self.odh, feature_list)
self.classifier.run(block=False) # block set to false so it will run in a seperate process.
There is a lot to unpack in this online classifier, so let’s go through it:
model=”SVM”: In this example, we are using a Support Vector Machine for classification.
rejection_type: Since rejection is known to improve usability, we have decided to include it.
rejection_threshold: Since SVM is known to have a greater range of probability outputs (compared to LDA, for example), we have a much lower rejection threshold. If we set this too high, the majority of decisions will inevitably be rejected.
majority_vote: To reduce spurious false activations (especially of the hand-closed class), we have decided to introduce a majority vote.
velocity: Finally, we decided to leverage velocity-based control to augment the experience. This means that when users contract harder, their character will move faster. Note, that since we are leveraging velocity, ramp contractions should be acquired during the training phase.
Python-Unity Connection
Now that we have the Python side set up, we had to create a way to listen for these UDP events in C#. To do this, the MyoEMGRawReader.cs was created to listen on a specific port (e.g., 12346). Note that the IP and port are the default values of the OnlineEMGClassifier. Every time it receives a value, the global control and speed variable used by the MovementControllerEMG.cs class are updated. This receive data function runs in a separate thread to constantly listen for EMG predictions. Note that this architecture relies on using System.Net.Sockets (the C# socket implementation).
String control = "";
float speed = 0.0f;

public string IP = "127.0.0.1";
public int port = 12346;

// receive thread function
private void ReceiveData()
{
    client = new UdpClient(port);
    while (true)
    {
        // receive bytes
        IPEndPoint anyIP = new IPEndPoint(IPAddress.Any, 0);
        byte[] buff = client.Receive(ref anyIP);

        // encode UTF8-coded bytes to text format
        string text = Encoding.UTF8.GetString(buff);
        string[] parts = text.Split(' ');
        control = parts[0];
        speed = float.Parse(parts[1]);
    }
}
In the update function in the MovementControllerEMG.cs the speed and control decisions are constantly read and converted to game input. There are a couple of interesting things to note here:
We are adding a force to the object to move it left and right. This force is multiplied by the speed multiplier (i.e., the contraction intensity).
To reduce multiple jumps, we added a 0.5s debounced timeout. This is similar to adding debouncing to mechanical bounces to reduce activations after the fact.
using System.Collections;
using System.Collections.Generic;
using UnityEngine;

public class MovementControllerEMG : MonoBehaviour
{
    private float speed = 25;
    private float upwardsForce = 300;
    public Rigidbody2D rb;
    private Vector2 velocity;
    private MyoEMGRawReader emgReader;
    private float jumpTime;

    private SoundManager soundManager;

    void Start() {
        soundManager = FindObjectOfType<SoundManager>();
        emgReader = new MyoEMGRawReader();
        emgReader.StartReadingData();
    }

    void FixedUpdate()
    {
        string control = emgReader.ReadControlFromArmband();
        float movSpeed = speed * emgReader.ReadSpeedFromArmband();
        Vector3 pos = rb.transform.position;
        if (control == "0") {
            // Debounce the jump
            if (Time.time - jumpTime > 0.5f) {
                rb.AddForce(new Vector2(0,1) * 300);
                soundManager.PlayJumpSound();
                jumpTime = Time.time;
            }
        } else if (control == "2") {
            //Extension:
            rb.AddForce(new Vector2(1,0) * movSpeed);
        } else if (control == "3") {
            //Flexion:
            rb.AddForce(new Vector2(-1,0) * movSpeed);
        }
        rb.transform.position = pos;
    }
}
References
[1] Aaron Tabor, Scott Bateman, Erik Scheme, David R. Flatla, and Kathrin Gerling. 2017. Designing Game-Based Myoelectric Prosthesis Training. In Proceedings of the 2017 CHI Conference on Human Factors in Computing Systems (CHI ‘17). Association for Computing Machinery, New York, NY, USA, 1352–1363. https://dl.acm.org/doi/10.1145/3025453.3025676
[2] A. Tabor, S. Bateman and E. Scheme, “Evaluation of Myoelectric Control Learning Using Multi-Session Game-Based Training,” in IEEE Transactions on Neural Systems and Rehabilitation Engineering, vol. 26, no. 9, pp. 1680-1689, Sept. 2018, doi: 10.1109/TNSRE.2018.2855561.